Getting Started with MQTTProbe Emulation
Built-in emulation
MQTTProbe has emulators built in. You can run Sparkplug B nodes (with devices and metrics) or Generic nodes that publish JSON, plain text, or hex payloads. Connect to any broker, open Emulation, and start poking around without needing other MQTT clients on the network.
How to launch it
- Open MQTTProbe (desktop, Android APK, Docker, or self-hosted web).
- Connect to a broker. If you do not have one handy, use a public seed like HiveMQ TCP, EMQX TLS, or Mosquitto WebSocket TLS from the connection screen.
- Open the Emulation panel.
- Add a Sparkplug B node (optionally configure devices and metrics), then click Start.
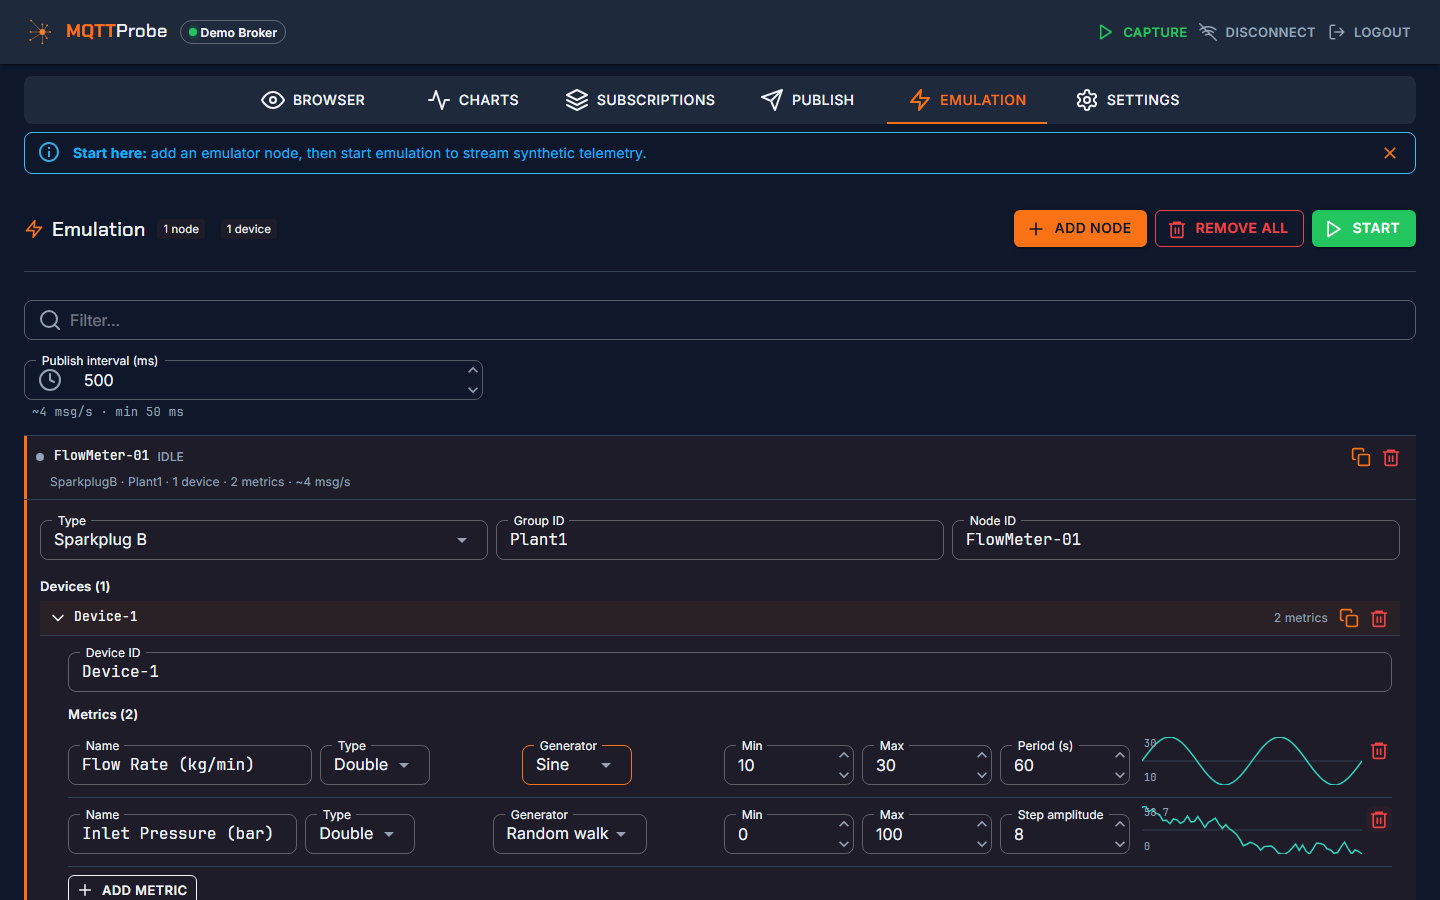
You will see an EoN node come online with NBIRTH, followed by periodic NDATA messages with simulated metrics. Add device-level emulation and you get DBIRTH and DDATA too.
For plain MQTT traffic without Sparkplug B framing, add a Generic node instead. You can publish JSON, plain text, or hex payloads on any topic.
What you can explore
Once emulation is running, everything works the same as with a real broker:
- Topic browser: navigate the generated topic tree. Click any topic to see the decoded payload.
- Payload viewer: Sparkplug B messages show decoded metrics with names, types, and values. JSON payloads render as interactive trees.
- Sparkplug Nodes view: see EoN nodes and their devices in a structured tree with birth certificates and current metric values.
- Subscriptions: subscribe to specific topics and watch messages arrive in real time.
- Charts: add chart fields from the decoded payloads and plot numeric values as live time-series.
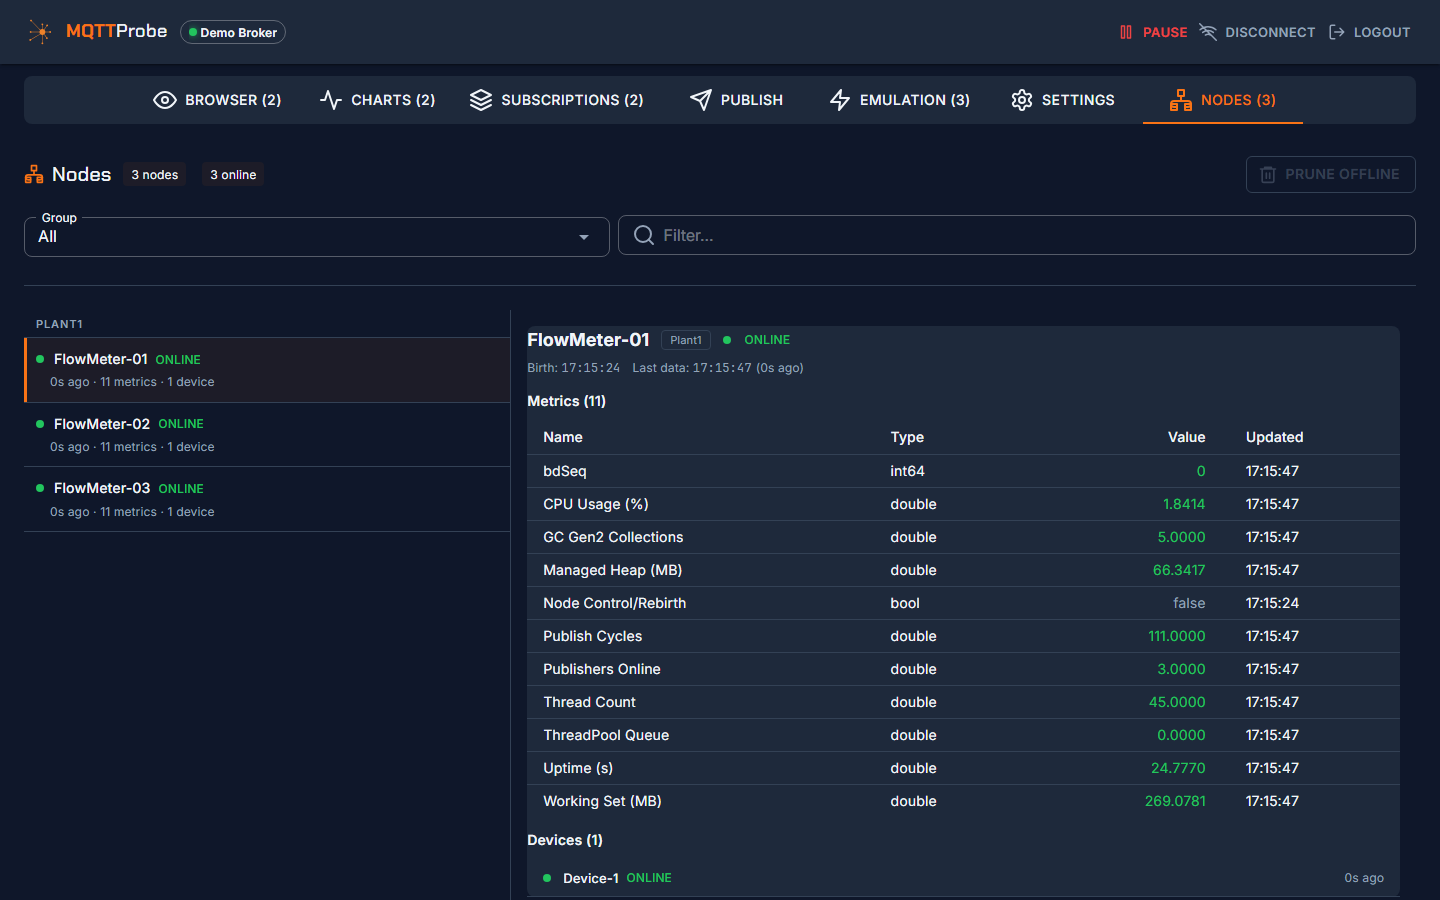
The emulators let you see exactly how MQTTProbe handles Sparkplug B and generic MQTT traffic before you point it at a real broker. If you like what you see, switch to a real connection. The UI is identical. The only difference is the data source.